
How to Print Proxies for Highlander the Card Game
- Randi McFarland

- Mar 3
- 5 min read
If you’re new to the idea, a proxy is simply a printed stand-in for an official card. It uses the same text and layout, but it’s usually produced independently for playtesting, casual games, or filling gaps in your collection. Proxies are helpful because they lower the barrier to entry. You can test a new Immortal, experiment with a different Weapon of Choice, or build a deck before committing to tracking down originals. For most organized play, proxies are legal and widely accepted. The exception is newly released paid sets found on the shop page. Those cannot be legally proxied for tournament use. Everything else exists to make the game more accessible, not less. A Proxy Status is included in the new Card Database.
Printing proxies for the first time can feel overwhelming, but once you have a handle on the process and understand the flow, it becomes pretty easy. The only “hard” part then is deciding which cards you want for your next deck build. This article will walk you through everything you need to know to order your Highlander the Card Game proxies.
Option #1 - DIY Home Printing
A proxy does not have to come from a factory to be usable. For many players, the most immediate path is the one sitting on their desk: a home printer, a stack of paper, and a sleeve. While at-home DIY printing isn't glamorous, it is practical. If the goal is testing a build, filling a gap, or getting cards on the table quickly, it works!
At its simplest, you print the card on standard paper, cut it out, and sleeve it over a real card. Once inside an opaque sleeve, it plays cleanly. The barrier to entry is low, and that’s the point.
If you want something sturdier, you can move into heavier stock. Just check your printer’s specifications before you buy the heavier stock. All printers have a maximum paper weight they can handle. Exceed it and you risk jams, smearing, or a wasted ream of card stock. I'm speaking from experience here...If you want to level up your at-home prints, consider the following:
1.) Use thicker cardstock that your printer is rated to handle.
2.) Arrange multiple cards on a single print sheet (insert image reference here).
This reduces margin distortion and keeps sizing consistent.
3.) Cut with a guillotine-style paper cutter rather than scissors. Straight edges matter more than most people expect.
4.) Finish with a 3mm corner rounder. Standard trading cards use rounded corners; matching that radius makes the difference between “prototype” and “placeholder.”

Printer tips and settings to consider:
Scale: Set to “Actual Size” or 100%. Avoid “Fit to Page.” Even slight scaling will throw off card proportions.
Paper Type: Select “Cardstock,” “Heavy Paper,” or “Matte Photo Paper,” depending on what you’re using. This adjusts ink density and drying behavior.
Quality: Use “High” or “Best” to preserve text clarity and color depth.
Double-Sided Printing: If printing backs, enable duplex printing and choose “Flip on long edge” to maintain correct orientation.
One of the main goals for the Card Database is to have every card image available and formatted for at-home printing. They will usually be the following size:750 x 1050.Any cards you download from the Database with those dimensions should be ready to go for at-home prints.If you download an image of a card front from the Card Database and its dimensions are 1500 x 2100, scale to 50% in your print settings if you want to have a regular-sized card!
Option #2 - Make Playing Cards (MPC)
MPC is the proxy king. They have been around for quite some time and reliably create high-quality, professional-looking, and great-feeling cards.
Printing proxies from MPC for the first time feels a little intimidating. You see terms like bleed, trim lines, card stock weight, and it sounds like you’re about to step into a professional print shop. We've tried to do the heavy lifting on our end so you don't have to. The technical work, sizing, margins, bleed, and safe zones have already been handled for you in the pre-formatted files from this site. The prize packs and immortal sets that are free to download are all pre-formatted for MPC/NOTMPC Prints. You can watch the video below to get a bird's-eye view of the entire process.
Here is a direct link to the correct card size and trim:
MPC Pros to consider
Wide range of card stock options
Ability to choose cheaper S27 stock
Foiling options available
More granular control over finish and feel
MPC Cons to consider
Overseas production
Longer shipping times
Costly shipping
Tariffs for US customers

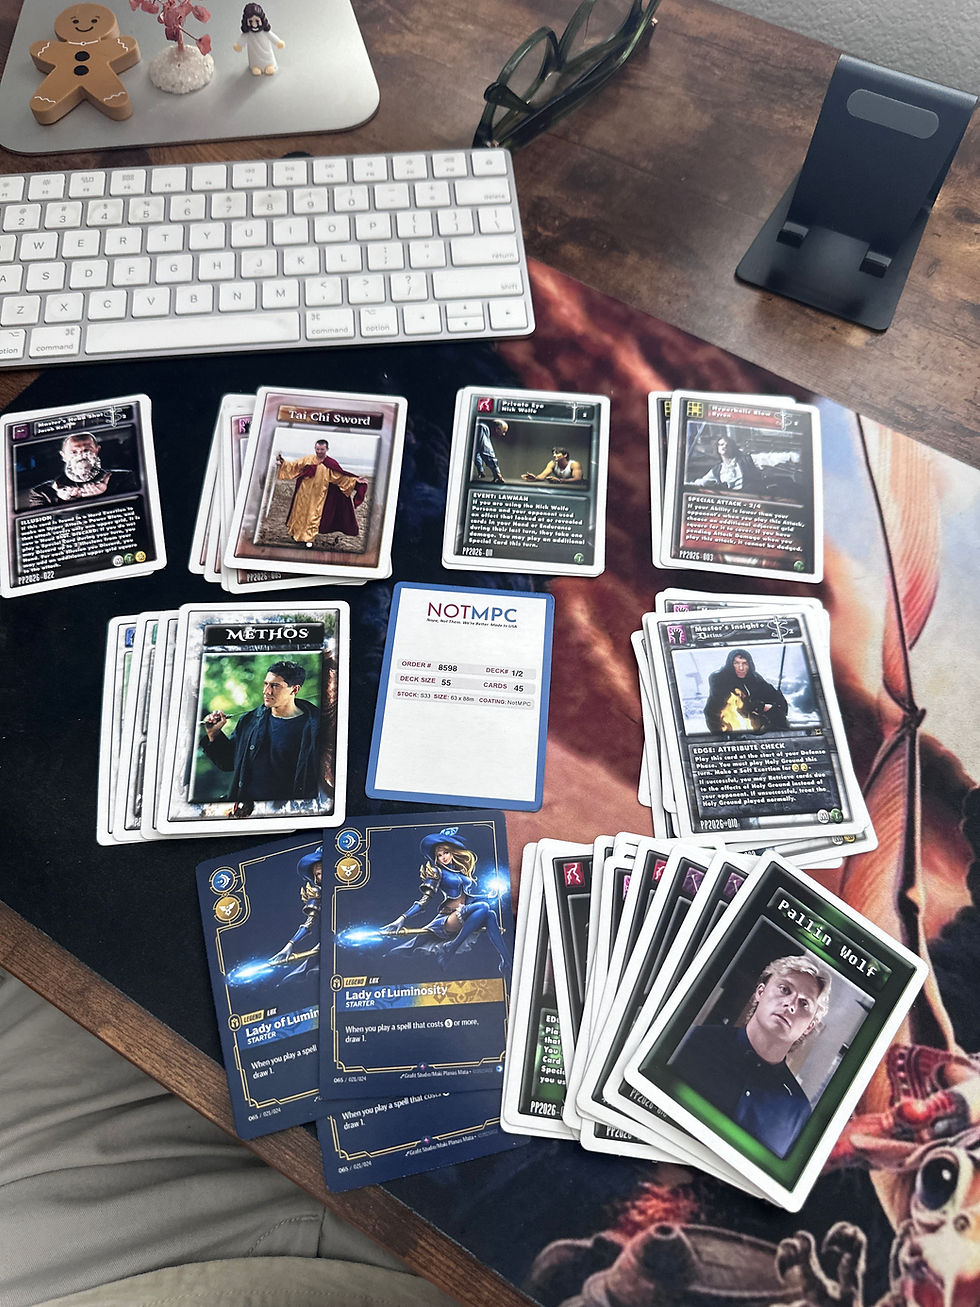
Option #3 - NOTMPC
NOTMPC is the new kid on the block. While I am not a fan of the branding and name choice, it is nice that the editor and basically the entire process are similar to MPC. The card size requirements and formatting options are the same too, so anything on the site that says MPC Proxy set will also work at NOTMPC.
https://notmpc.com/custom-game-cards/ Not MPC Pros
US-based production
Faster shipping
No tariffs for US customers
Cheaper shipping costs
less options for card stock
Not MPC Cons
Fewer card stock options
Less variety in specialty finishes
Corner rounds a marginally less sharp than MPC
The Easiest Way to Print
The simplest method is downloading the pre-formatted Immortal proxy sets. These files are already sized correctly with bleed accounted for. All you have to do is make sure you select the correct trim/card size.
Download the proxy set.
Make a note of how many cards you want to actually print so you know what size of deck to select at MPC or NOTMPC. 18, 36, 55 etc. You don't have to have exact matches for your deck size and what you want printed. You can leave some cards blank if you choose.
If you don't have an account yet, create one at MPC or NOTMPC.
For MPC, go to this link: https://www.makeplayingcards.com/design/custom-blank-card-traditional-size.html and select your card stock. S30 is similar to a lot of the 2E card stock. If you want a little higher quality, thicker card, opt for S33 instead. Choose MPC game card finish.

5.) You will be asked if you want different fronts or same fronts. Choose different fronts.
6.) You will be able to add the images for the card fronts!
Here’s a practical hack that saves time:
Before uploading, duplicate any card image in the folder for however many copies you want to print. If you need three of a card, make two additional copies in the folder first. Then upload the entire folder and use the AutoMap feature on MPC or NOTMPC. The system will automatically match the images to card slots in seconds.
That small step prevents manual dragging and reduces errors. It also makes scaling up, printing 18, 24, 36 cards less annoying.
Hope this guide helps and happy printing!


Comments